About The Review:
This ASUS PB287Q monitor was provided by ASUS for review purposes. I will be reviewing the build construction, picture quality, and overall technical performance of the PB287Q, including input lag performance.
Display Details
| Size: | 28″ | Panel: | 10-bit (8-bit w/FRC) |
| Resolution: | 3840 x 2160 (4K) | Dynamic Contrast Ratio: | 100000000:1 |
| Aspect Ratio: | 16:9 | Panel Type: | TN |
| Response Time: | 1ms GTG | Viewing Angle: | 170/160 |
| Display Colors: | 1073.7M (10bit) | Color Gamut: | sRGB |
Inputs, Features, & MSRP
| Inputs/Outputs: | 2x HDMI/MHL | DisplayPort | – | – |
| Inputs/Outputs (Cont.): | Headphone Jack | Line-In | – | – |
| Features & MSRP: | under $650 on Amazon | – | – | – |

The ASUS PB287Q: At A Glance
ASUS unveiled the PB287Q at CES 2014, an event that was packed with new 4K displays from every manufacturer. The key difference between this monitor and others was its affordability, fitting an MSRP well under $1,000. Running content natively at 4K (which is presently governed with a resolution of 3840 x 2160) allows us to take advantage of four times the resolution of Full HD (1080p) content. The increase in pixel density will be most noticeable at closer ranges, typically the ranges that are mostly viewed on computer monitors. Since its debut, the ASUS PB287Q has seen a price reduction to $650 (and can be found even lower on Amazon), making it one of the best choices for entry level 4K. Find out more about the ASUS PB287Q in the review below.
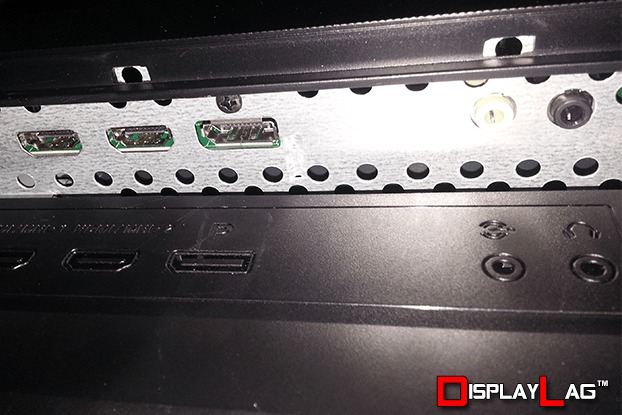
ASUS favors modern digital inputs with the PB287Q, including dual HDMI/MHL and DisplayPort.
ASUS strongly favors an all-digital input selection with the PB287Q, featuring dual HDMI ports and a DisplayPort. Users of D-Sub and DVI will be disappointed to know that the monitor only features those three inputs for sources, so choose your adapters and converters accordingly. I’m sure the reasoning behind this was to use connections that can fully take advantage of 4K. Both HDMI ports support MHL devices, for those that may require it. A Line-in port and headphone jack are present for your audio needs, and can be configured within the OSD depending on your audio sources. ASUS has also included speakers built inside the PB287Q, which is a nice convenience for those that want some sound without hooking up external speakers. The quality of the sound is very basic with no bass, so don’t expect much from them. The volume was plenty sufficient using the volume setting, and it is unlikely that you will need to max out the volume, unless you are in a large area. I managed to test the headphone jack using my V-Moda M-100 headphones, and found the volume output to be fairly decent. It is important to note that sending a 4K signal via HDMI on this monitor will result in a maximum refresh rate of 30hz. In order to experience 4K resolution at 60hz, you will need to utilize DisplayPort.
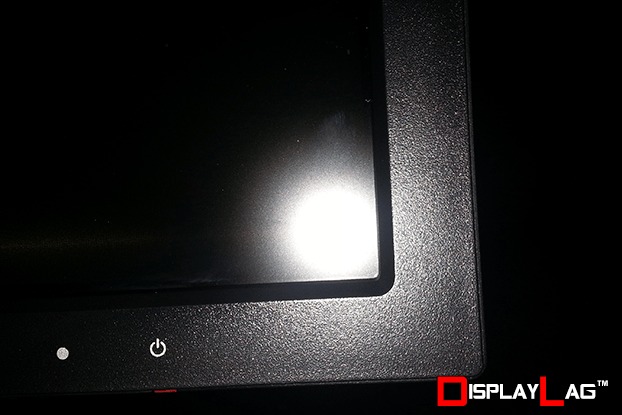
The bezel does a good job at complimenting the PB287Q’s aesthetic design.
ASUS has been very minimalist when it comes to a lot of their monitor designs, and the PB287Q doesn’t stray from this path. No fancy styling here; you’ll be looking at an all-black casing free of distractions. The monitor comes with an input cover attached by default, which can mask the heads of the connections you connect to the PB287Q. In my opinion, this should be attached after connecting the cables, as it can be a little hard to find the right inputs with the cover attached. The stand certainly lives up to expectations, offering considerable weight to keep the monitor stable on most surfaces. It features vertical height adjustment, tilt, as well as portrait and lanscape orientations. The stand is also able to swivel the whole monitor, allowing users of triple monitor setups ease of placement. The overall build quality of the PB287Q is solid, and I can’t think of any major problems during my time with it.
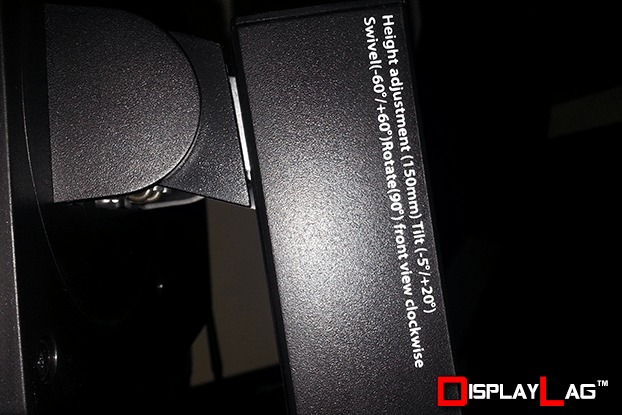
Placement is not an issue with the PB287Q, as the stand allows complete height and tilt configuration.
Panel Specs:
The PB287Q features a 28″ TN panel with a 3840 x 2160 (4K) resolution. Its refresh rate maxes out at 60hz, and it is capable of displaying 10-bit color. The main advantage of a TN panel is the presence of low response time, and this monitor features a 1ms GTG response time in that regard. The monitor’s dynamic contrast ratio, labeled as ASUS Smart Contrast Ratio, is pegged at 100000000:1. The monitor is designed primarily for 16:9 content, so for those interested in more vertical screen estate, you will have to pursue a 16:10 monitor instead.
Buttons:
The buttons on the ASUS PB287Q are extremely similar to the last ASUS monitor I reviewed, the VN279QL. The physical buttons are purely tactile, and are placed behind the monitor on the bottom-right portion of the casing. To this date, ASUS have some of the most responsive button operation available on monitors today. There was no noticeable lag present when operating the OSD menus, allowing me to quickly and efficiently configure the monitor without much trouble.
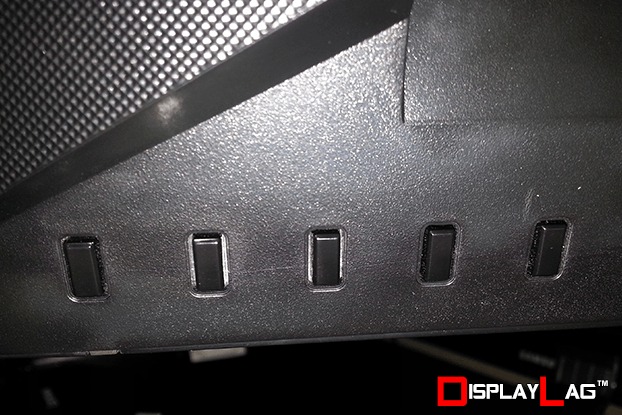
The physical buttons are nearly identical to the VN279QL, offering quick and smooth operation.
Viewing Angles & Uniformity:
There isn’t much to say about the viewing angles on the PB287Q. If you have used TN monitors in the past (and there is a strong chance you have), this monitor’s viewing angles won’t particularly blow you away in any regard. There will be gamma shifting when your head is tilted too far in one direction, so maintaining an eye-level with the monitor is a must. The good news is, most manufacturers have equipped very robust stands with their monitors, and you can utilize the stand to fine-tune the appearance of your display. ASUS is no exception in this regard, as the stand on the PB287Q allows you to position the monitor adequately for your needs.
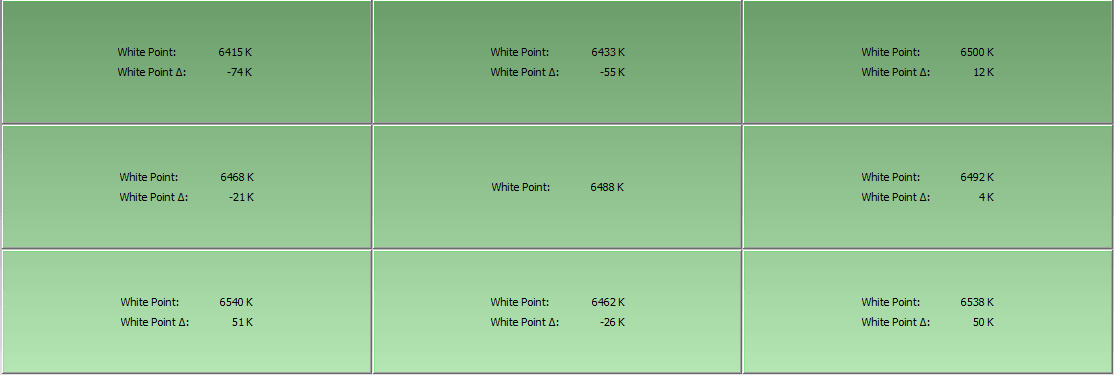
The calibration results show the variance among different parts of the screen. The monitor was configured to be as close as possible to 120 cd/m² in terms of brightness. The luminance report shows slight variation from the center, with a maximum deviance of -24 cd/m² on the top left portion of the screen. Without the aid of an ICC profile, I managed to calibrate the PB287Q to a white point setting of 6488K, just shy of the recommended 6500K for computer monitors. In terms of white point, you can expect a maximum deviance of approximately -74K on the top left portion of the screen as well. Overall, I didn’t experience any drastic uniformity issues with the PB287Q, and it should be acceptable to the majority of the users that are in the market for this screen.
Menu Items and Features (OSD)
The PB287Q features a refresh of the OSD we’re used to seeing on most ASUS monitors. Pressing any of the buttons brings up a menu that allows you to select between Menu, QuickFit, Input Select, Brightness, and Splendid options. Splendid allows you to select various picture mode presets that can be further calibrated on selection. There is an option for more customization options by pressing the Menu key, which brings an additional set of options. In this menu, you can configure Splendid, Color, Image, Sound, PIP/PBP, Input Select, System Setup, and Shortcut settings. Some options aren’t available for configuration in certain picture modes, though this is a common practice in most monitors nowadays. Under the Color settings, configurable options include Brightness, Contrast, Saturation, Color Temperature, Skin Tone, and Smart View. The Image menu allows us to configure Sharpness, Trace Free, Aspect Control, VividPixel, and ASCR (dynamic contrast). As mentioned earlier, ASUS’ OSD is one of the best available on monitors today, offering nearly instantaneous response at the push of a button.
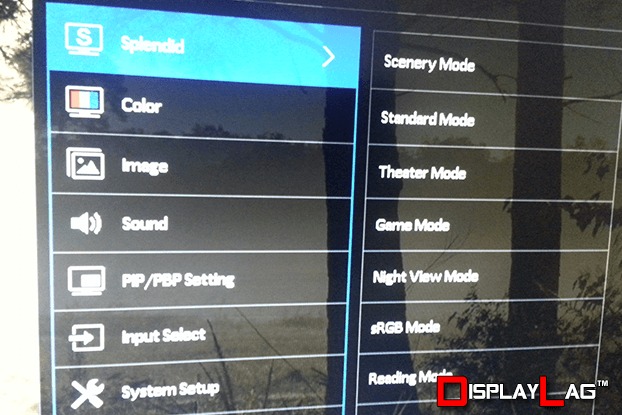
The OSD is an enhanced version of previous ASUS menu systems, retaining the quick navigation from earlier models.
Black, White, and Color Output:
Getting the most out of the PB287Q requires you to select the right picture mode for calibration. The available picture modes are Scenery, Standard, Theater, Game, Night View, sRGB, Reading, and Darkroom. I personally found Standard to offer the most accuracy once configured, though keep in mind it will lock out your Saturation, Skin Tone, Sharpness, and ASCR settings (not that you would really need them for a calibrated picture). The Brightness setting controls the backlight of the monitor, whereas the Contrast controls the white level, which will impact your contrast ratio. Using only the menu controls, I was able to get a calibrated white point of 6488K for the center, which is very close to the recommended 6500K setting. For further accuracy, I recommend using the ICC profile supplied in the settings below. After using the ICC profile supplied below along with these picture settings, the ASUS PB287Q managed to score a perfect 6500K through the white point test.
Splendid Mode: Standard
Brightness: 33 (119cd/m² for dark rooms. Increase if too dim.)
Contrast: 80
Color Temperature: User Mode (R: 100, G: 94, B: 93)
Smart View: Off
Trace Free: 60
Aspect Control: Full
VividPixel: Off
Note: These settings were achieved using an i1 Display Pro, along with X-Rite’s i1 Profiler software. The GPU used on the test computer is an Nvidia GTX 670 using stock settings. These settings require an additional ICC profile for accuracy. The ICC profile for the ASUS PB287Q can be downloaded here. Use these settings at your own discretion, as they may look different on your display.
Scaling:
Scaling shouldn’t be an issue for anyone that requires monitor scaling, as the monitor offers Full, 4:3, 1:1, and OverScan modes depending on your input signal. I generally advise against using monitor scaling if the option to use GPU scaling is available, however as this is a 4K monitor, it is not possible for the majority of devices to scale 1080p sources to 4K on their own just yet. Thankfully, the PB287Q does a pretty good job at scaling 1080p sources to 4K. You will experience a significantly softer picture in doing so (regardless of GPU or monitor scaling), and it is recommended to always match the native resolution of the display whenever possible.
Measured Input Lag:
I have tested several 4K displays within the last year, and the most disappointing thing about them is their dramatic increase in terms of input lag over 1080p sets. Where the average HDTV was scoring 25-50ms with input lag tests, 4K HDTVs were scoring anywhere between 40-102ms, with the majority of them hovering above 70ms once set to game mode. This is honestly unacceptable performance for any gamer that has experienced input lag, significantly hampering the enjoyment of several games that require any form of timing. A quick glance at our input lag database gives you an idea of the amount of input lag present in the most recent displays.
The ASUS PB287Q does not suffer from this. I was expecting the worst when it came to input lag, however I was extremely surprised at the results. Using both 720p and 1080p lag testers across all picture modes resulted in nearly identical results. While I was unable to measure input lag using a 4K source natively, there is almost no chance that the input lag would be any higher if tested with a 4K source. It may actually be lower, as the monitor wouldn’t have to do any scaling to compensate. The PB287Q’s input lag measurements are as follows:
- Top: 3.2ms
- Middle: 10.6ms
- Bottom: 18.2ms
Using the average of all three measurements through a 1080p source, we receive an average input lag rating of 11ms, once rounded to the nearest millisecond. This is an exceptional result, and goes to show that manufacturers can achieve low input lag at with 4K displays, even with lower resolution sources. The current landscape for 4K HDTVs isn’t very bright when it comes to input lag presently, and it’s refreshing to see ASUS still cater to gamers that care about input lag with the PB287Q.
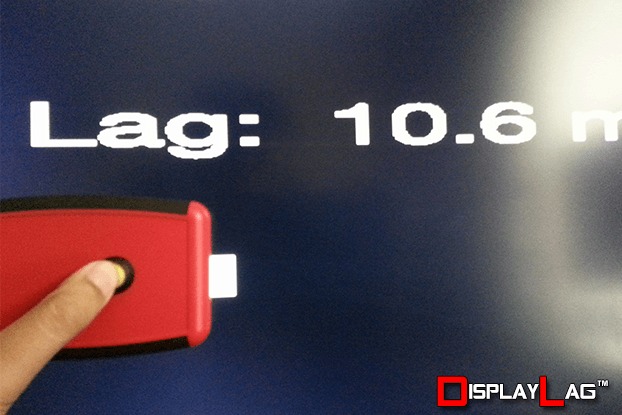
The ASUS PB287Q features an average input lag rating of 11ms, making it the fastest 4K display we’ve tested.
Gaming Performance:
To measure the actual feel of input lag, I use the Xbox 360 version of Ultra Street Fighter IV as my preferred benchmark, as I’m very seasoned with the intricacies of the game. While switching back and forth on the fly between my BenQ RL2455HM and the ASUS PB287Q, I was trying to see if I could spot any differences with my timings. I am happy to report that both monitors felt identical when it came to input response, which makes sense considering that the PB287Q yielded 11ms in our input lag test. The RL2455HM was tested to be 10ms when I first reviewed it. The 1ms difference will not be noticeable, as it takes approximately 16.7ms to produce 1 frame of lag. To further test the gaming performance of this monitor, I also booted up the PC version of Ultra Street Fighter IV, as the PC version is capable producing higher resolutions than 1080p. Testing from 1280 x 720 all the way to 3840 x 2160 resulted in no difference of timing that I could detect.

This image was captured from Far Cry 3 running at 4K, with an off-screen camera zoomed in. Notice the smoothness of the gun, even at such a close range. Anti-aliasing was disabled.
While not a scientific test, I personally feel that the PB287Q has an excellent scaler that doesn’t produce any significant lag when scaling sources below 4K resolutions to its native resolution. This is a great achievement from ASUS, as some users of this monitor may want to use it for their Xbox One and PlayStation 4 consoles, as well a 4K-capable device such as a PC. Another thing worth mentioning is the actual benefit of 4K resolutions. If you’re currently a PC gamer, I feel that 4K is more beneficial through a monitor than a HDTV. This is because we naturally sit close to our monitor, which would allow us to see individual pixels at lower resolutions, if viewed within a few feet. Running a game natively at 4K is truly a sight to behold, as it allows you to run a game without any anti-aliasing, due to the pixel density being so high at 4K. During my gameplay sessions with Far Cry 3 and Crysis 3, I was able to zoom my face into the monitor far beyond comfortable viewing limits, and was surprised to see how sharp the image remained. I still wasn’t able to count individual pixels.
Motion Blur:
One advantage of TN-based panels is their low response times when compared to IPS, VA, and other technologies. The ASUS PB287Q features an advertised 1ms GTG response time, which is as low as it gets currently for TN panels. The overdrive function of the monitor is handled through a setting called Trace Free, which comes with six different settings, ranging from 0-100. Out of the box, Trace Free is set to 60, and I recommend keeping it at that setting for most of your use. Setting it to lower amounts tends to exaggerate the blurring, whereas setting it above 60 causes noticeable artifacts in fast moving objects. I found 60 to be a good compromise of fast response time, without noticeable artifacts. You can view the gallery below to see the comparison of Trace Free settings. All images were captured at 4K resolution running at 60hz via DisplayPort.


